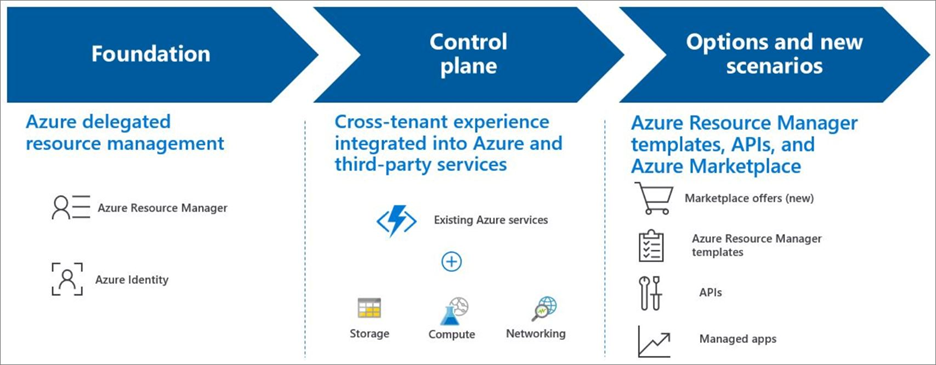
Azure Light House
Azure lighthouseenable you to manage multitenant with scalability and enhanced governance across resources. Using Azure Lighthouse service providers can deliver their managed services to manage multiple customer's tenants or subscriptions from a single control panel
It facilitates cross-tenant management, offering enhanced visibility and control for managed service providers (MSSPs) and large organizations with multiple Azure environments.
Lighthouse also provide Customers to maintain control over who is authorize to which resource and what actions they can perform.

LightHouse Working
Let’s understand, Azure Lighthouse working principalactually it is based on the Azure delegated resource management concept.
Azure delegated resource management
Azure lighthouse helps service providers simplify customers management experience, where customers delegate their resources to service providers with agility and precision to take care of these resources. Only authorized users, groups and service principal can access customer subscription without having an account in customer’s Tenant. This concept is known as Azure delegated resource managements.

Accessing customer resources from MSSP tenant
Before understanding this access mechanism, we need ourselves to get familiar with the following resources which get created when we onboard customers in customer’s tenant.
- Registration definition
- It contains the details of AuzreLight house offer ( managing tenant ID, authorized users, groups and service principals).
- Created at subscription level for each delegated subscription or in each delegated resource group.
- Registration assignment
- Registeration assignment assigns the registeration definition to a specific scope that is onboarded either a subscription(s) and/or resource group(s).
Now let’s deep dive into access mechanism.
Azure Lighthouse creates a logical projection of resources from one tenant onto another tenant which lets authorized service provider users to work in delegated customer subscription and resource group on behalf of their customers, without needing to log in to each customer's tenant separately.
When a service provider's user, group, or service principal accesses resources in a customer's tenant, Azure Resource Manager authenticates the request. It checks for two resources in the customer's tenant: the registration definition and the registration assignment. If both are present, Manager authorizes the access just as it within the customer’s own tenant.
If we summarize this process,
- Identify the roles needed for your users to manage the customer's Azure resources.
- Onboard the customer by either publishing a Managed Service offer to Azure Marketplace or deploying an Azure Resource Manager template.
- Authorized users sign in to Managing tenant (MSSP) and manage the customer's resources within the defined scope i.e. subscription(s) or resource group(s). Customers can monitor all actions and revoke access anytime.


The above images describe the working of Lighthosue at higher level.
Customer’s Onboarding
In this article we’ll explore ARM template approach by creating it from Azure portal where we define scope at subscription level.
To onboard your customer, you'll need to create an Azure Resource Manager template. You can create this template in the Azure portal, or by manually modifying the templates provided in Microsoft’s repo
Azure provides multiple templates to address different onboarding scenarios. Following are the template options to onboard customers.
- Subscription Template
- Onboard a customer's subscription to Azure Lighthouse. Each subscription requires a distinct deployment.
- ResourceGroup and Multiple-ResourceGroups Template
- Onboard one or more of a customer's resource groups to Azure Lighthouse. Use rg.json to onboard a single resource group, or multi-rg.json to onboard multiple resource groups within a subscription.
- Marketplace-delegated-resource-management Template
- If you've published a managed services offer on the Azure Marketplace, you can use this template to onboard resources for customers who have accepted the offer. Just make sure the values in the parameters file match those you used when you created your offer.
Azure Resource Manager template containing the following information.
- Name describing the title of the offer, it must be unique
- A description of your offer
- Your tenant ID
- PrincipalId values for the user/groups/service principal
Once we have created ARM template from MSSP tenant, the last thing is to deploy it over customer’s tenant.
Deployment of Lighthouse
We’ve covered a theory part for our basic understanding, it's time to get our hands dirty with Ligthouse.
Prerequisites
- You must have permission for Azure subscription owner for both creating and deploying ARM.
- Registered Microsoft.ManagedService provider in each Azure subscription that will be delegated via Resource Provider.
Create ARM template
- Login to your MSSP azure portal and search for lighthouse.
- Go to Manage your customers, from Overview tab select Create ARM Template button.

- Provide a Name, description and delegated scope required for your offer.

- Add users you want to provide access to customer’s tenant by selecting Add authorization. From Principal type under Role assignment, you can select user, group or service principal. I’m selecting it for a user and also need to assign a relevant built-in role which is required, in my case it is “Microsoft Sentinel Contributor”. You can add multiple users or groups. If you are a MSSP, then to manage LAW and sentinel following roles are enough to implement principal of least privilege.
- Reader
- Microsoft Sentinel Responder
- Microsoft Sentinel Reader

After adding users.

- Next step is to decide access type, for which you two options.
- Eligible, you will need to specify options for maximum duration, multifactor authentication, and whether or not approval is required. It is recommended.

- Permanent, for which a session will always stay active whenever you access it. I’ll go with this option as it just for testing.

- In the final step, you review the template and click on Download button. I’ve also added a json code for my template.
{
"$schema": "https://schema.management.azure.com/schemas/2019-08-01/subscriptionDeploymentTemplate.json#",
"contentVersion": "1.0.0.0",
"parameters": {
"mspOfferName": {
"type": "string",
"metadata": {
"description": "Specify a unique name for your offer"
},
"defaultValue": "MSSP-Sentinel-Services"
},
"mspOfferDescription": {
"type": "string",
"metadata": {
"description": "Name of the Managed Service Provider offering"
},
"defaultValue": "Managing Sentinel services "
}
},
"variables": {
"mspRegistrationName": "[guid(parameters('mspOfferName'))]",
"mspAssignmentName": "[guid(parameters('mspOfferName'))]",
"managedByTenantId": "c81a04cf-ba7a-418d-b122-090ed8136da7",
"authorizations": [
{
"principalId": "1a7a9018-aec1-4421-b87d-c556aefafdb4",
"roleDefinitionId": "b24988ac-6180-42a0-ab88-20f7382dd24c",
"principalIdDisplayName": "SLMAN ALI"
},
{
"principalId": "bbd52a3a-67c6-4cad-b47c-c533180fe08e",
"roleDefinitionId": "3e150937-b8fe-4cfb-8069-0eaf05ecd056",
"principalIdDisplayName": "ubaid
}
]
},
"resources": [
{
"type": "Microsoft.ManagedServices/registrationDefinitions",
"apiVersion": "2020-02-01-preview",
"name": "[variables('mspRegistrationName')]",
"properties": {
"registrationDefinitionName": "[parameters('mspOfferName')]",
"description": "[parameters('mspOfferDescription')]",
"managedByTenantId": "[variables('')]",
"authorizations": "[variables('authorizations')]"
}
},
{
"type": "Microsoft.ManagedServices/registrationAssignments",
"apiVersion": "2020-02-01-preview",
"name": "[variables('mspAssignmentName')]",
"dependsOn": [
"[resourceId('Microsoft.ManagedServices/registrationDefinitions/', variables('mspRegistrationName'))]"
],
"properties": {
"registrationDefinitionId": "[resourceId('Microsoft.ManagedServices/registrationDefinitions/', variables('mspRegistrationName'))]"
}
}
],
"outputs": {
"mspOfferName": {
"type": "string",
"value": "[concat('Managed by', ' ', parameters('mspOfferName'))]"
},
"authorizations": {
"type": "array",
"value": "[variables('authorizations')]"
}
}
}

Deploy ARM Template
Now we’ve ARM template, lets login to Customer’s tenant and deploy a downloaded ARM. For deployment we’ve three options.
- Deploy in the Azure portal
- Deploy by using PowerShell
- Deploy by using Azure CLI
We will deploy it through Azure portal.
- Go to lighthouse, service providers page and click on service provider offers.
- Click on Add offer and select Add via template as shown in below image.


- Once the template file gets uploaded, you will see the information regarding the service provider offer to what scope they’ve requested an access in which region and all other information.

- Click on next button to review the terms.

- After reviewing the terms, click on create button to deploy the ARM under customer’s tenant. Within few mints you’ll see a notification for successfully deployment.
Let’s validate our deployment for both tenants. Starting from customer’s tenant we are already there.
- From lighthouse → Service provider page, select ‘Service Provider offers’ here you will see the Name and delegation scope for your service provider.

- If you select ‘MSSP-Sentinel-Services’, a new window will appeared containing all information about the service provider and the users who have accessed to customer’s tenant as shown in the following images.


Now, let’s validate it from service provider tenant.
- Navigate to ‘My Customers’ page from lighthouse. Here you’ll see the list of customers you are managing.

- If you’ve been delegated with subscription scope, customer’s subscription will also visible to you under your tenant.

- Lastly, let's check how many instances of sentinel are visible to us.

Wow, now we can manage customer’s sentinel from our tenant without need to login to different tenant. Allat one place
NoteWhen you are validating customer onboarding from Service provider tenant, it might take time to reflect in my case it takes more than two hours. Infact, I’ve deployed it again it takes around two days. So don’t panic, make sure you’ve selected all the subscriptions as shown in the below image. If still it is not visible go for troubleshooting link is attached below. If issue persists, open a support ticket with Microsoft.

REFERENCES